Keystoning Correction in Photoshop

Keystoning occurs when the subject is not parallel with the camera lense. For example, if the camera lense is closer to the bottom of the building, it will appear much larger than the top of the building in the photograph.


1. Double the size of the canvas. Image > Canvas Size
2. Select the entire image area.
3. Edit > Transform > Skew
To rectify right angles and retain proportions do not pull top corner fully out, but only halfway out, and then pull other corner halfway in, creating a fulcrum upon the midpoint of the line.

It may help to view the image with a grid. View > Show > Grid
4. Now crop out the superfluous two corners.

Photoshop Actions

Are you spending too much time with repetitive tasks in Photoshop? Photoshop actions allows you to record a process and save that information as an action which you can then use for other tasks down the road. Not only that, you can edit actions after the fact and customize them to suit your needs.

While you can make an unlimited amount of actions, including color correction, below is an example of how to resize images ideal for Powerpoint. Take some time to plan the steps of the actions before recording.

1. Select “New Action” from the bottom right of the Actions window. Title the action and click “Record.”


2. To resize the image, go to the Image menu and select Image Size. Change the resolution to 150dpi.


3. Now SAVE AS a JPEG to a specific location on your computer.

4. Finally, click the “Stop” button at the bottom left of the Actions window. You can now use this action on individual images by pressing the “Play” button or Batch Process an entire folder.


Changing Text Box Background Color in Photoshop

Are you trying to add labels to maps, charts, drawings, or other images in Photoshop? Are you finding it impossible to change the background color of your text box?

If so, that’s because it is impossible! Photoshop does not have this functionality. There is a workaround, however, if you’d like to continue working with your image in Photoshop:

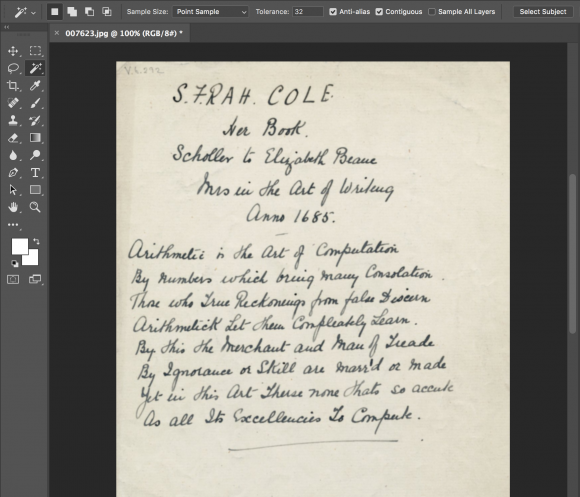
First, create your text box by selecting the “T” tool from your Photoshop Toolbox.

You can change the size, style, and color of your font from the top menu.

Next, find your Rectangle Tool. It may be hidden behind a tool that looks like a forward slash (/). To switch tools, mouse over the / icon and hit control, then select the Rectangle Tool.

Using the Rectangle Tool, draw a box around your text. You can adjust the color and opacity from the top menu. If you don’t see an option for opacity at top, you can change the opacity from the layer adjustment tools at right.

You can then send the box you made behind the text by going to Layer > Arrange > Send Backward.

By default, each time you create a new object or text box you will create a new layer. You may want to flatten the image periodically, if you know that you won’t be making further adjustments to some boxes/text. You can also learn more about managing your layers in CS6 by viewing this tutorial.


Sharpening an Image in Photoshop

Do you have an image that is out-of-focus? The Sharpen tool in Photoshop can help!

Open the image in Photoshop. Zoom in (Select View from the menu and go to Actual Pixels for best results).

The image, at 100% zoom, looks blurry. The letters appear fuzzy.

To sharpen, go to Filter > Sharpen, and select Sharpen or Sharpen More.

As you can see, the edges are crisper and the legend is easier to read after sharpening. You can sharpen as many times as is necessary, but make sure that the image doesn’t begin to look pixelated. This is a sign of over-sharpening.